How to Make a Custom PVC Sign
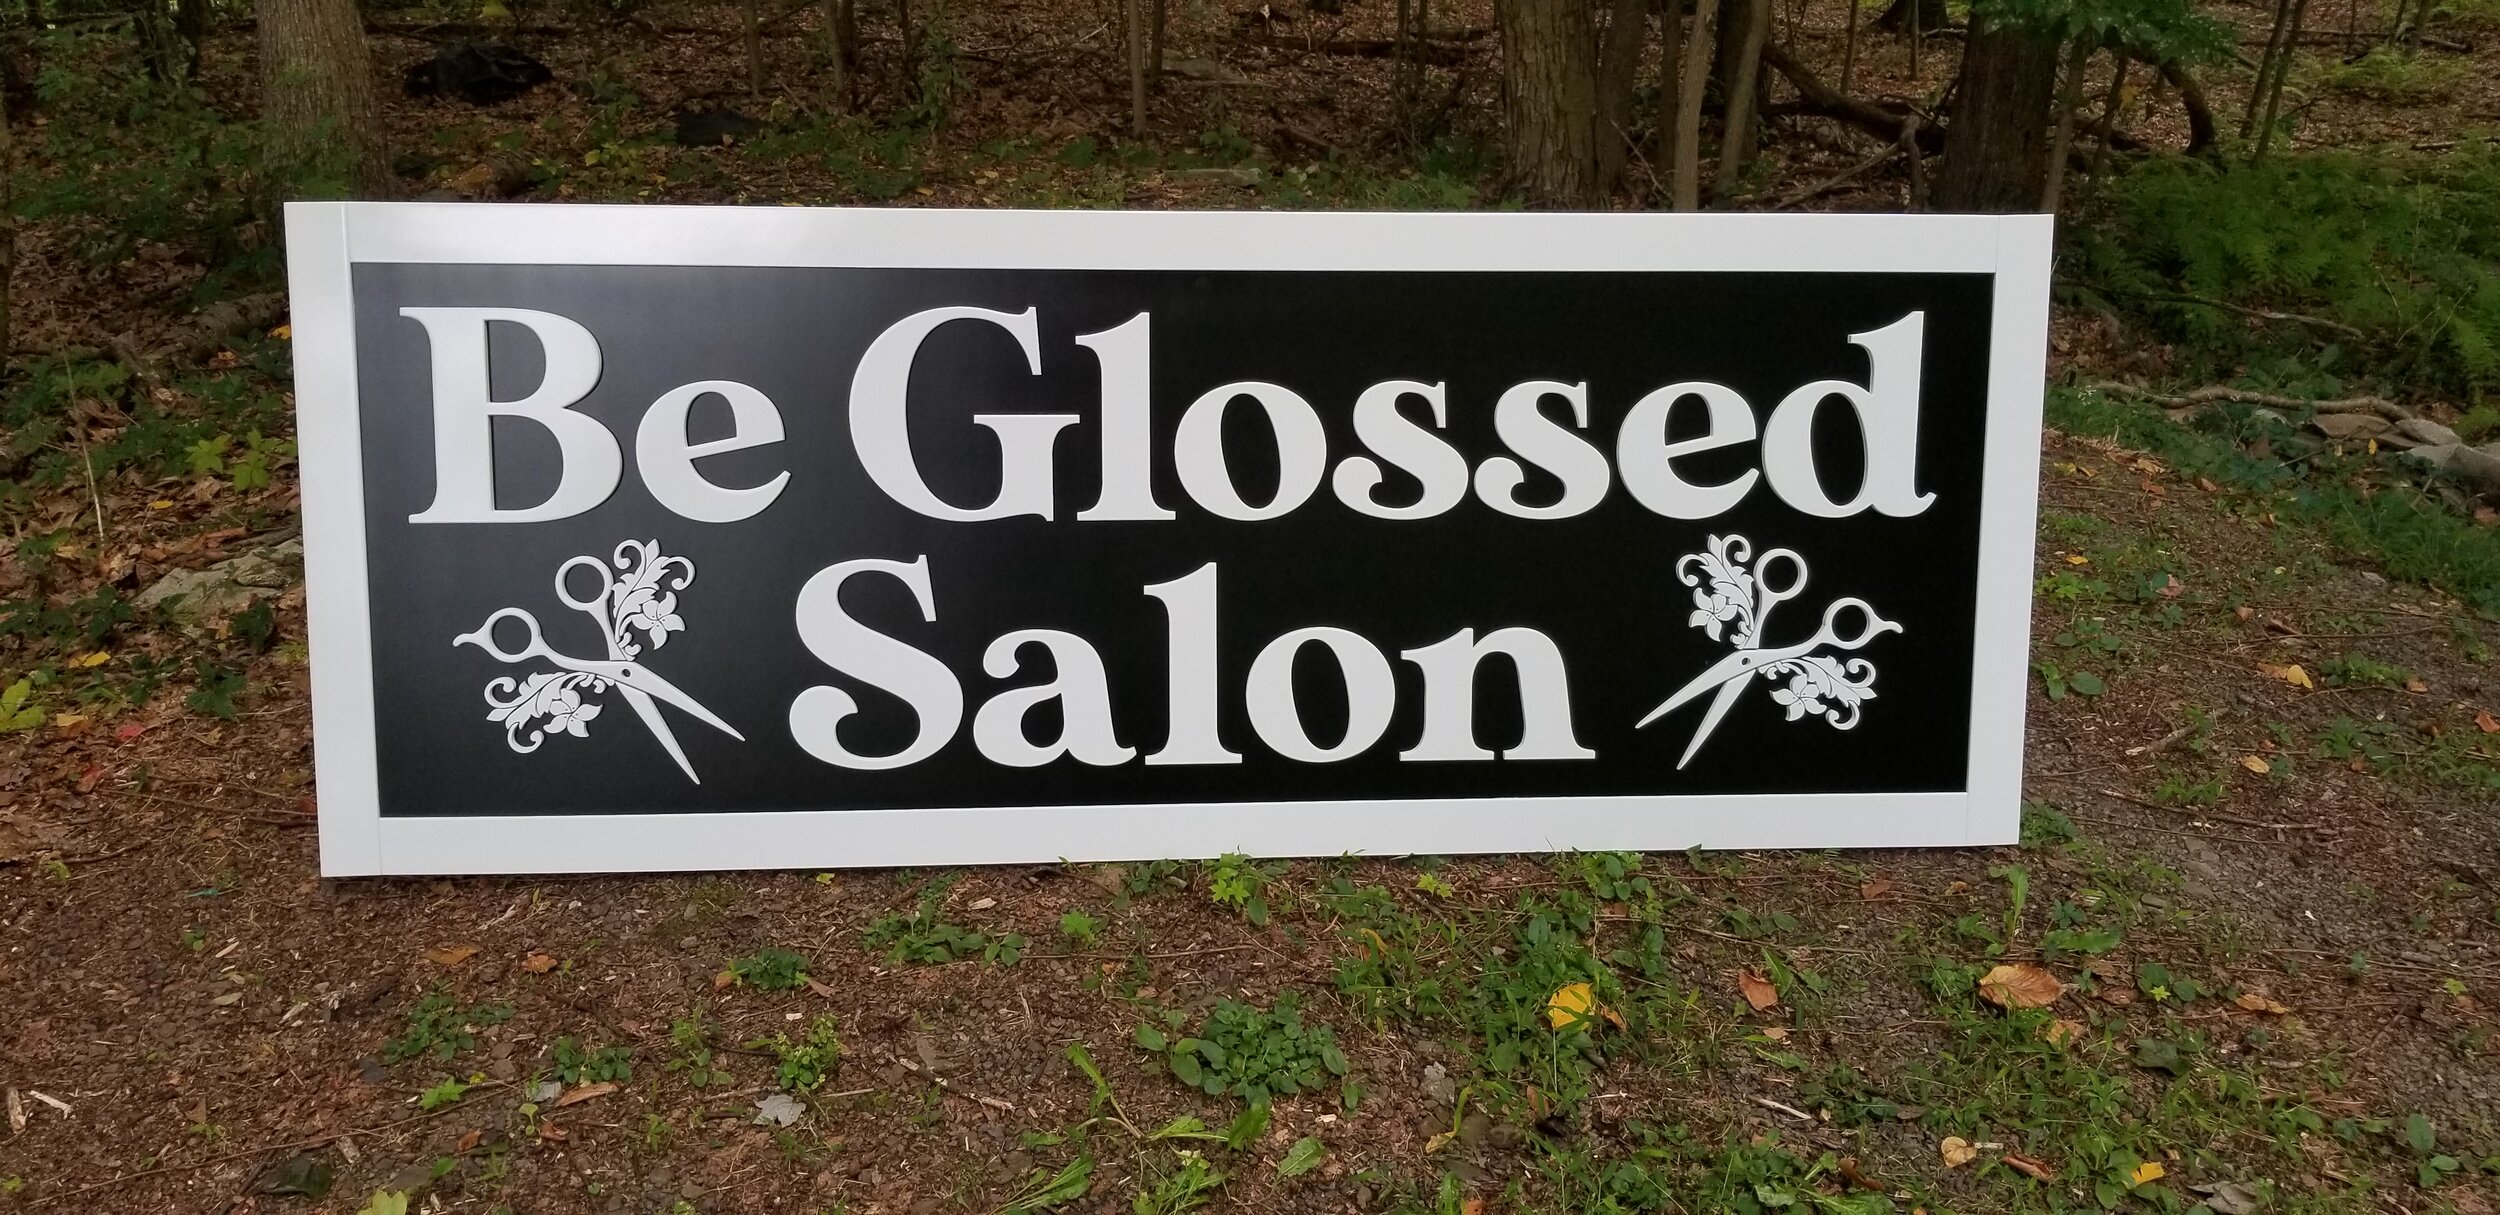
A local hair salon in my area contacted me to make them a custom sign for their new location they are opening up. Right away I recommended to use PVC as the sign material because of it’s great weather resistance and long lasting properties outdoors. ACM (aluminum composite material) was another option, but ultimately we went with PVC. I knew this project would make a perfect tutorial, so I documented along the way and below you will find the steps I use to make a custom sign for a client as well as a great video I put together.
Step 1: Design
This step can be challenging sometimes if you don’t have much direction what the final product will look like. In this case, they knew close to what they wanted the sign to look like, so that helped me a lot. I did need more information when they first contacted me, so this is exactly what I use to get a better understanding of what the customer wants and get a more accurate quote for the sign:
I can definitely get you an estimate but first I will need some more information:
-What thickness and type of material do you want this sign? (I can do wood, plywood, mdf, acrylic, pvc plastic, or aluminum composite material)
-Is this for indoor or outdoor? (If it is for outdoor, I recommend acrylic, pvc plastic, or aluminum composite material)
-Do you need it finished or unfinished? (Paint, stain, primer, clear coat, etc.)
-Do you know what font you would like the text? (I can do standard fonts or custom fonts(within reason) from www.dafont.com)
-What is your sign to say and what height do you want the text?
-Do you need it shipped?Once I have this information, I should be able to give you a much more accurate quote.

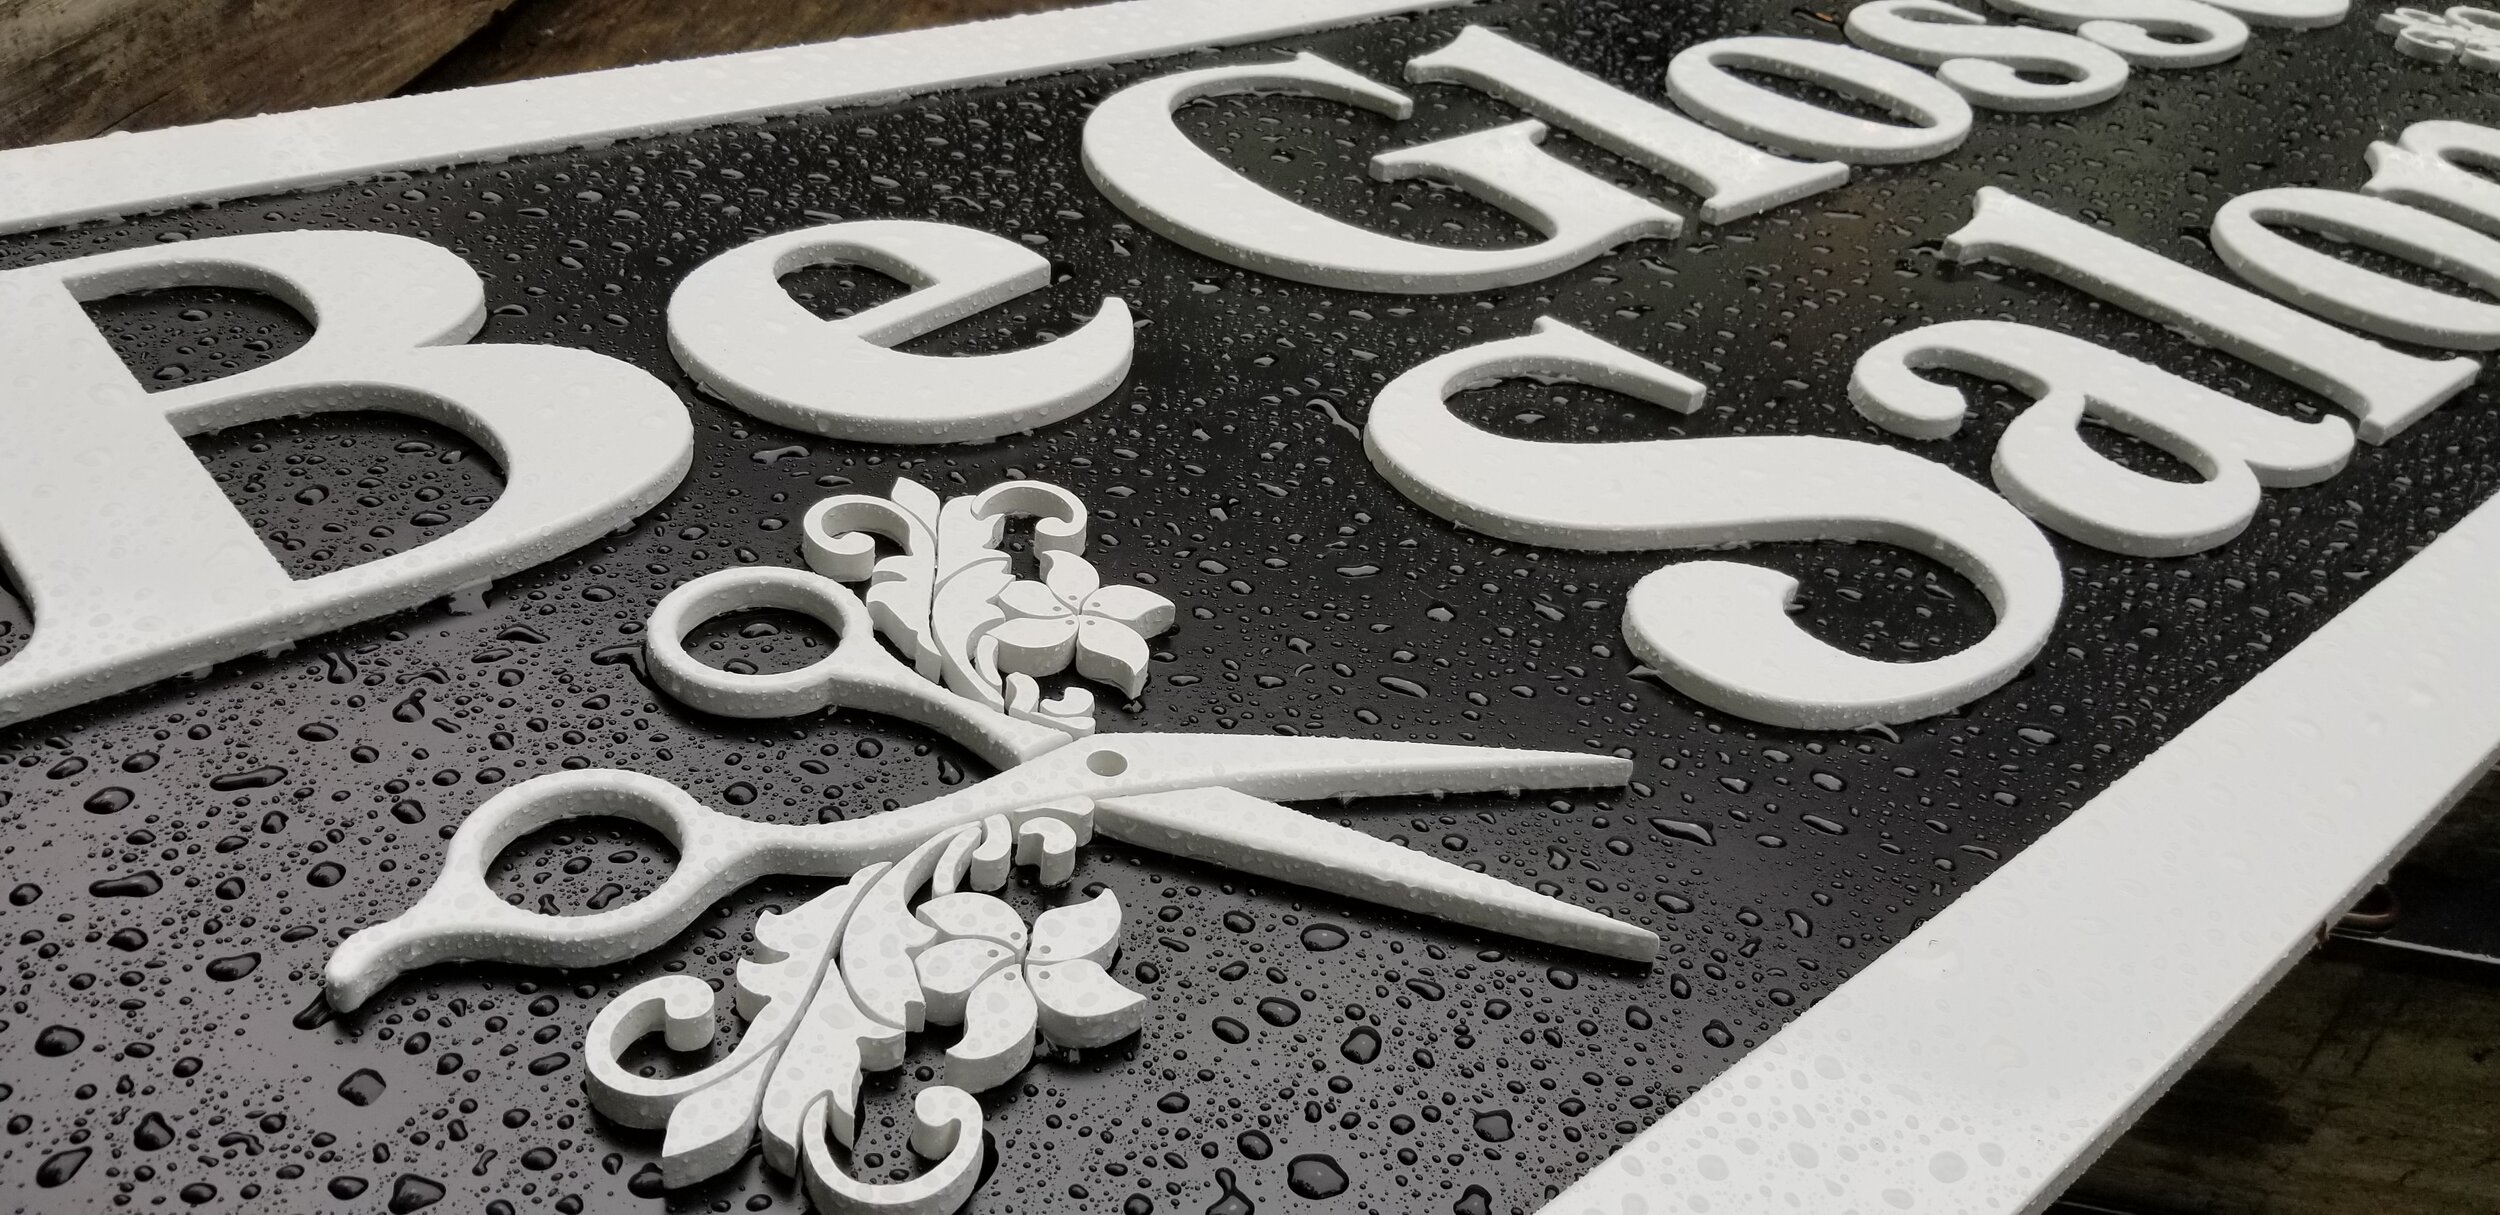
After I had all of my questions answered, this in the original sign design that I came up with using VCarve Pro. I added the swirls on the sides of the “Salon” just to fill up some of the empty space.

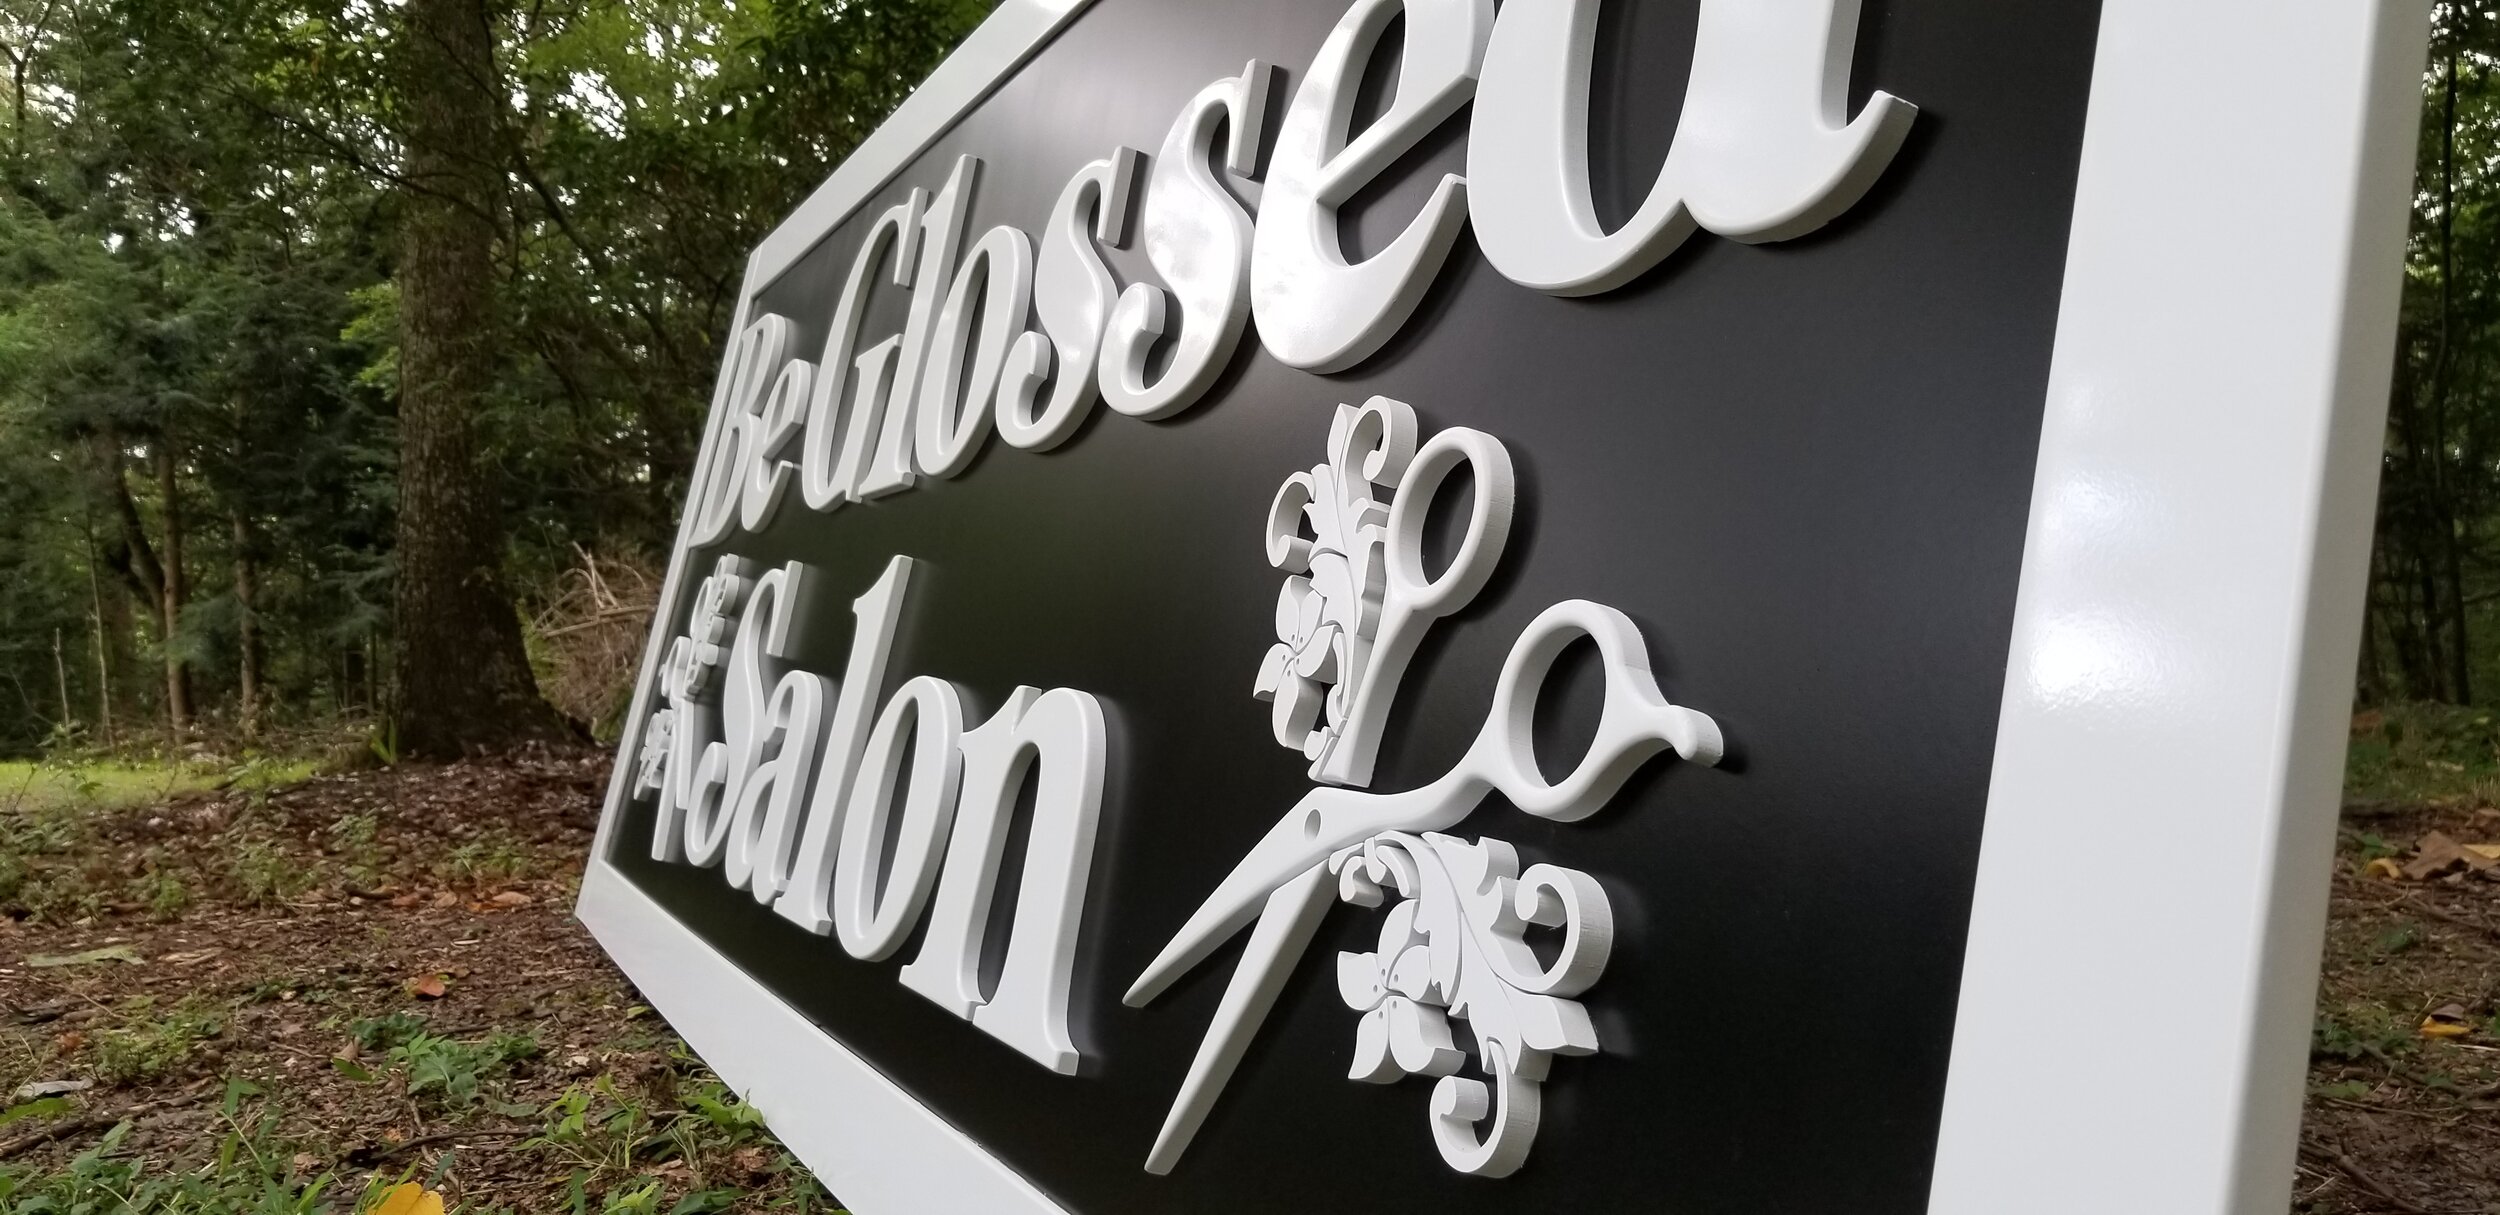
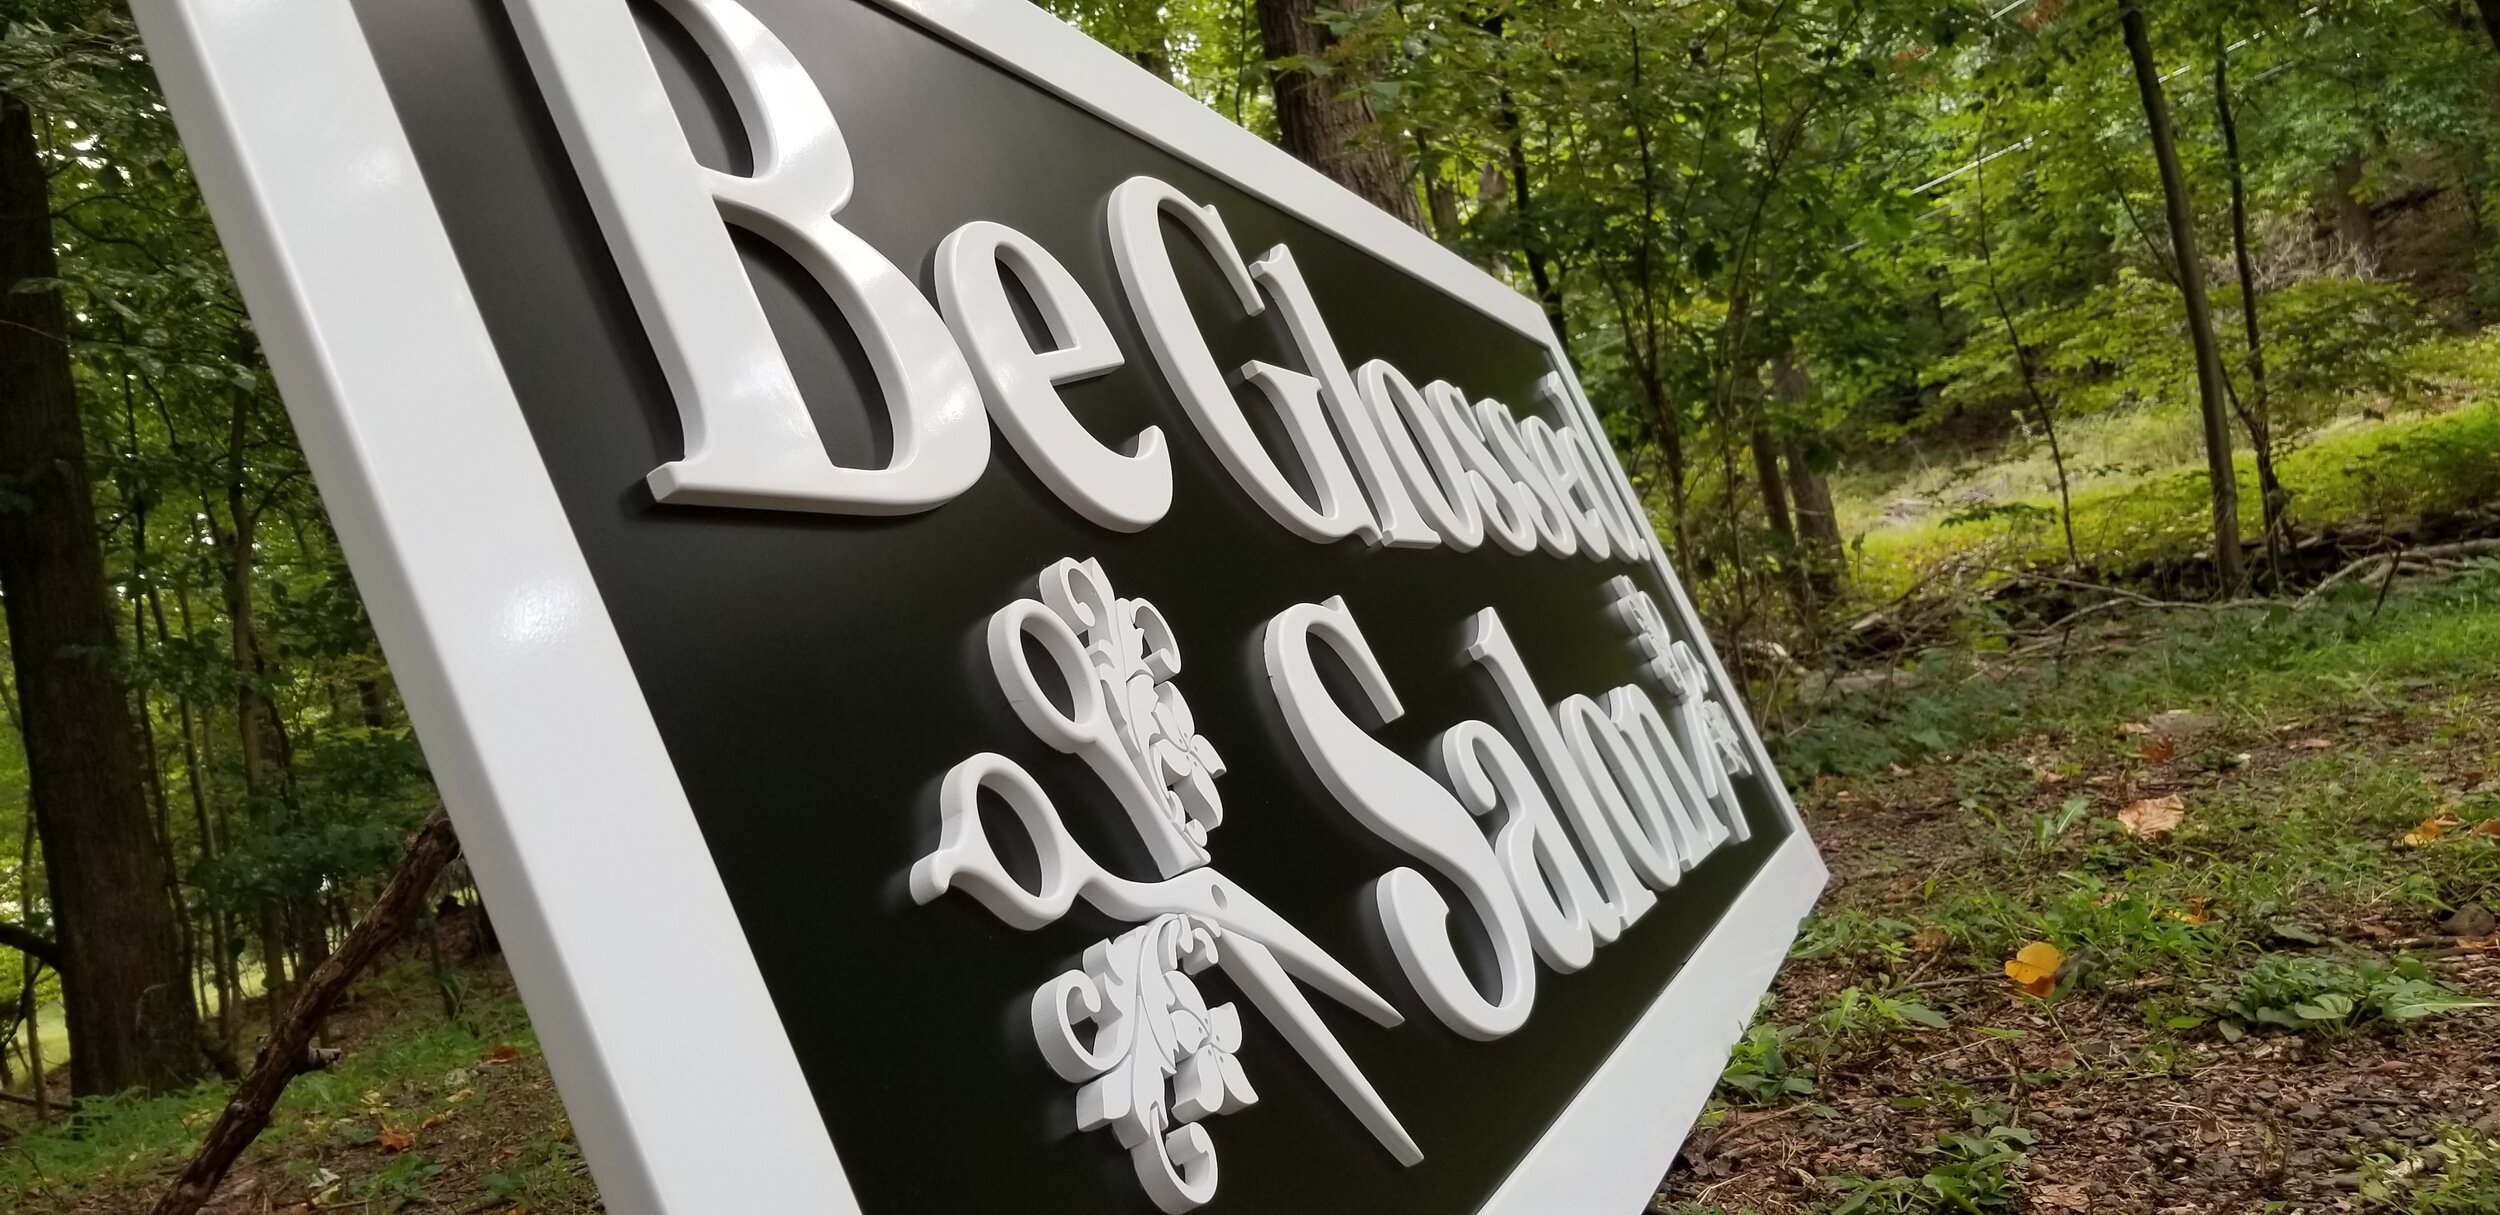
They loved the design except they wanted to change the swirls to a floral design of scissors that they sent me a picture of to image trace. So this is what I revised it to and they were very happy with it and I got my approval to start making the sign.
Step 2: Make the Toolpaths
For a sign this large (34 x 90 inches), I decided it would be best to make the back one flat piece and then make the sign design and frame pieces that can be glued on separately. The sign renderings above were done with a simple pocket toolpath in VCarve Pro just to send to the customer. This gives the customer a very close idea what the final design would look like and allows them to approve or not approve the design. Although, I do not use this pocket toolpath in my actual project, I only use this for the visualization. To get the separate colors in the rendering, I just set the material color to solid white and then set the pocket toolpath color to solid black.

To make the actual toolpaths used for this project, I first had to use VCarve Pro’s nesting feature to nest all of my objects into the size of PVC I had. This feature allows you to optimize the best usage of your material. After nesting the objects to my desired settings, I then just created a simple profile toolpath to cut all of the shapes out.
To learn more on how to use Vectric software, check out my Vectric Master Training Course.
Step 3: Material Setup

One of my favorite methods to hold material to the CNC waste board is the painter’s tape and super glue method. This technique is especially useful when you have lots of tiny pieces that could get ruined or sucked up by the dust collection while cutting them out. Another benefit is that you do not have to use tabs that require lots of cleanup later.
To use the painter’s tape and super glue method, just simply apply blue painter’s tape to the bottom of your material and the surface of your waste board. Then apply super glue to one surface of the tape and optionally, you can use an activator of the other tape surface to cure the glue almost instantly.
The glue and activator I use is called 2P-10 and can be found on Amazon.
Step 4: Cut Out the Parts

This step is very simple, just setup your material and CNC, then click send and watch your project come to life! The bit I used was an Amana 46125-
K and it cut the PVC flawlessly and made the finishing steps much easier.
Step 5: Make the Backer & Frame:

For this step, I cut the back to size using 1/2” thick PVC and then I cut the frame pieces to size using 3/4” thick PVC. I then sanded the back up to 220 grit sandpaper. Lastly, I used a Scotch Brite pad to scuff the surface, wax & grease remover to get any contaminates off, and then finished up with 4 coats of Rust-Oleum satin black paint.
Step 6: Ease the Edges

This step is very messy but also very crucial to get a nice smooth look to all of the edges of the sign. For this particular project, I used a 1/8” roundover bit.
Step 7: LOTS of Sanding

This is by-far my least favorite step but it is also one of the most important. When painting items, they say it is 90% prep work and 10% actually painting to get the best results and they are definitely correct with that statement. For this step I use a orbital sander up to 220 grit for as many parts as I can, then I hand sand any areas that I could not get with the sander. I also use mini files to square up the radius inside corners left by the CNC.
Step 8: Quick Test Fit

This is another very important step I like to do before painting all of the pieces because this will ensure everything should work out as you plan when it comes time to assemble everything. It also was good I did this because I ended up finding out that I was missing 3 tiny pieces that snuck their way onto the floor.
Step 9: Assemble the Frame

Here I just simply pocket screwed the corners of the PVC frame together. The frame is 3/4 x 3” strips of PVC with a 3/8” x 1/2” rabbet along the inside edges to accept the 1/2” PVC backer board inside of it.
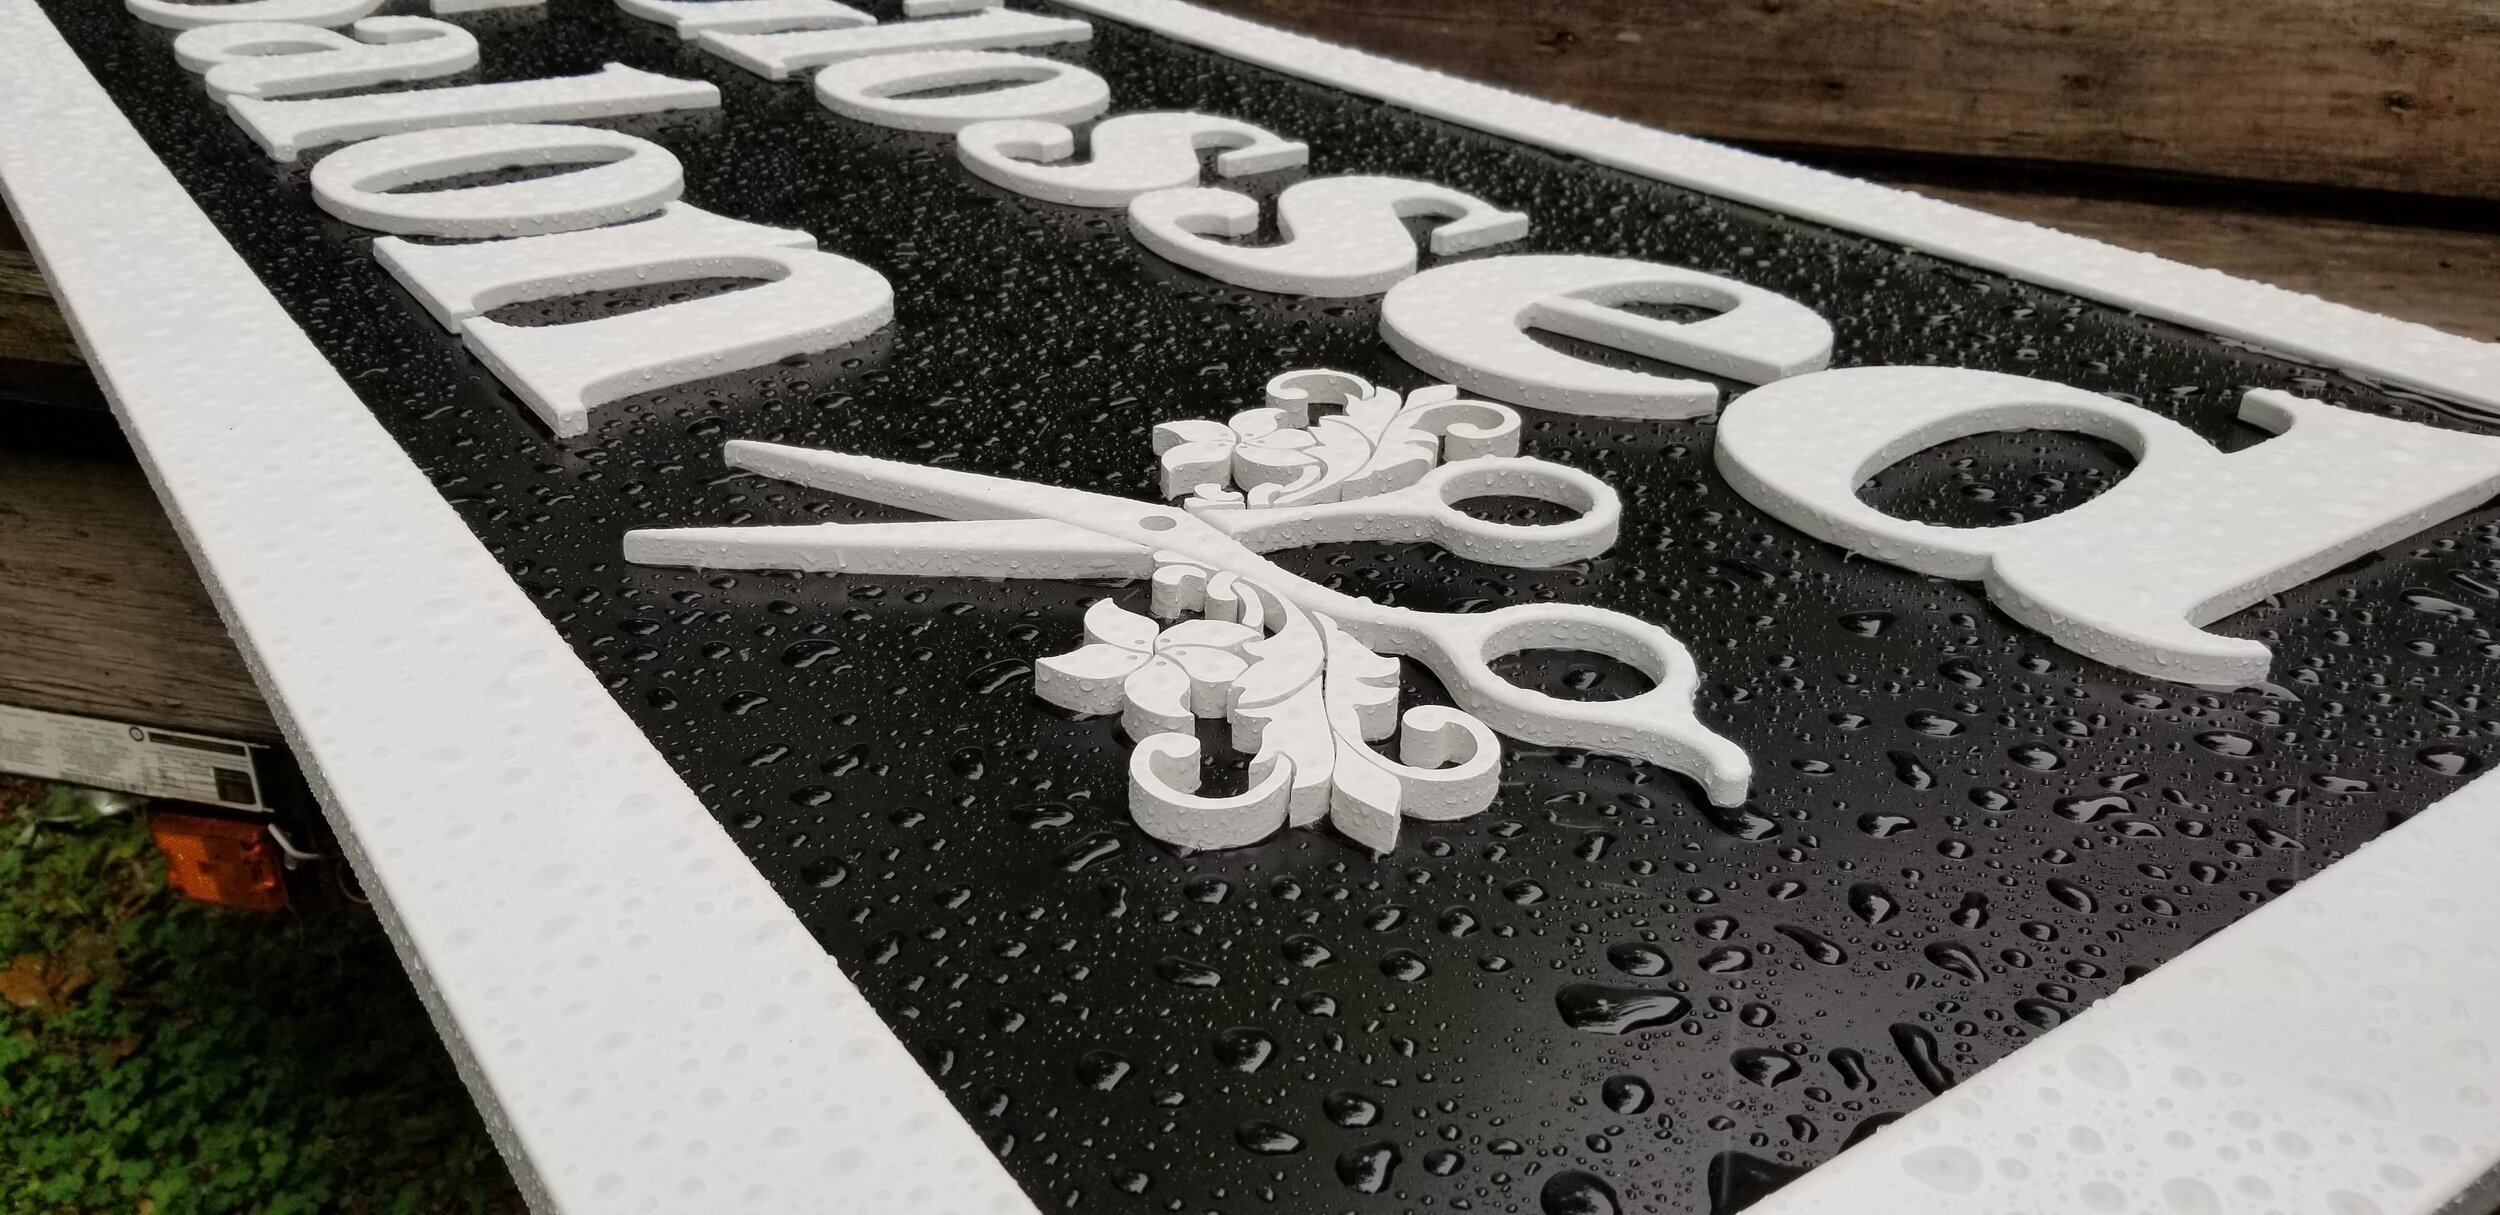
Step 10: Paint the Remaining Parts

I used the same techniques as in Step 5 but this time I used Rust-Oleum ultimate high gloss white.
Final Step: Assemble!

This is my favorite step because you get to see all of your hard work come together! There are many ways that you can align your parts but in this case, I used a laser line across the sign to keep the parts straight and then took measurement locations off of my VCarve design to make sure everything was spaced correctly.
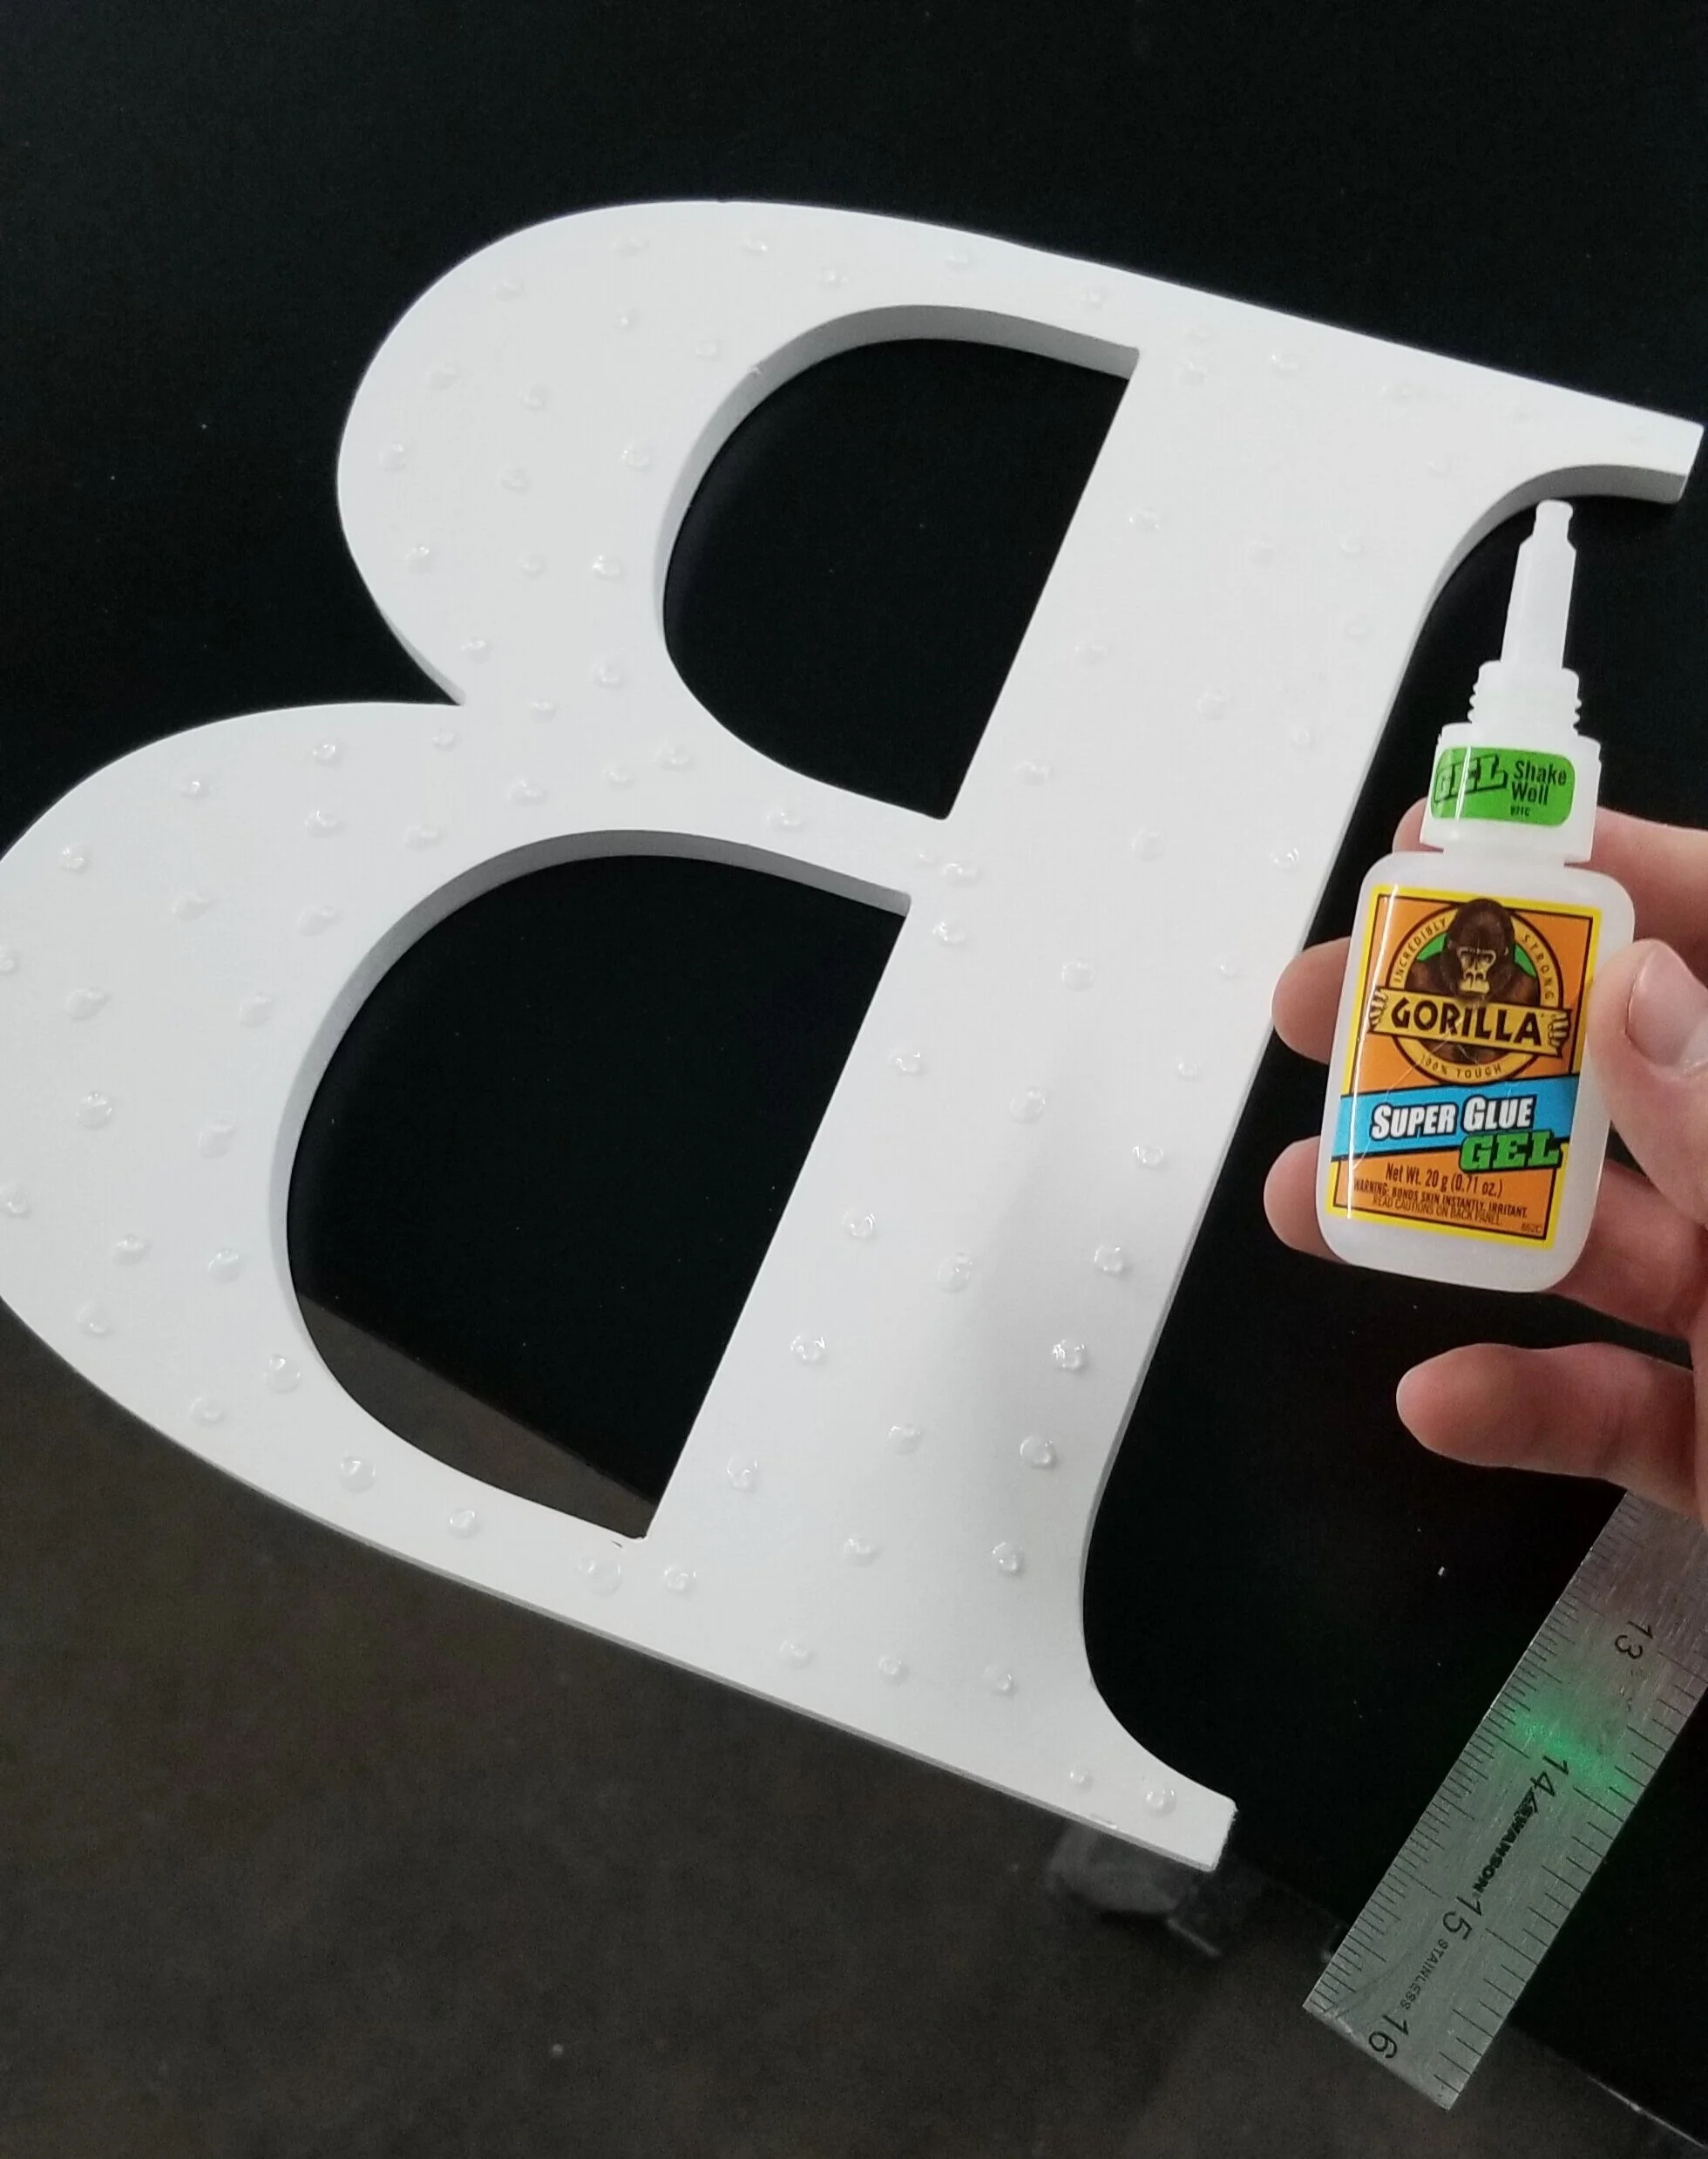
I tested many different glues and I found this Gorilla Super Glue Gel to have the strongest holding power. I like to only apply dots of glue to the back of the letters because they have a much stronger holding power than lines of glue.
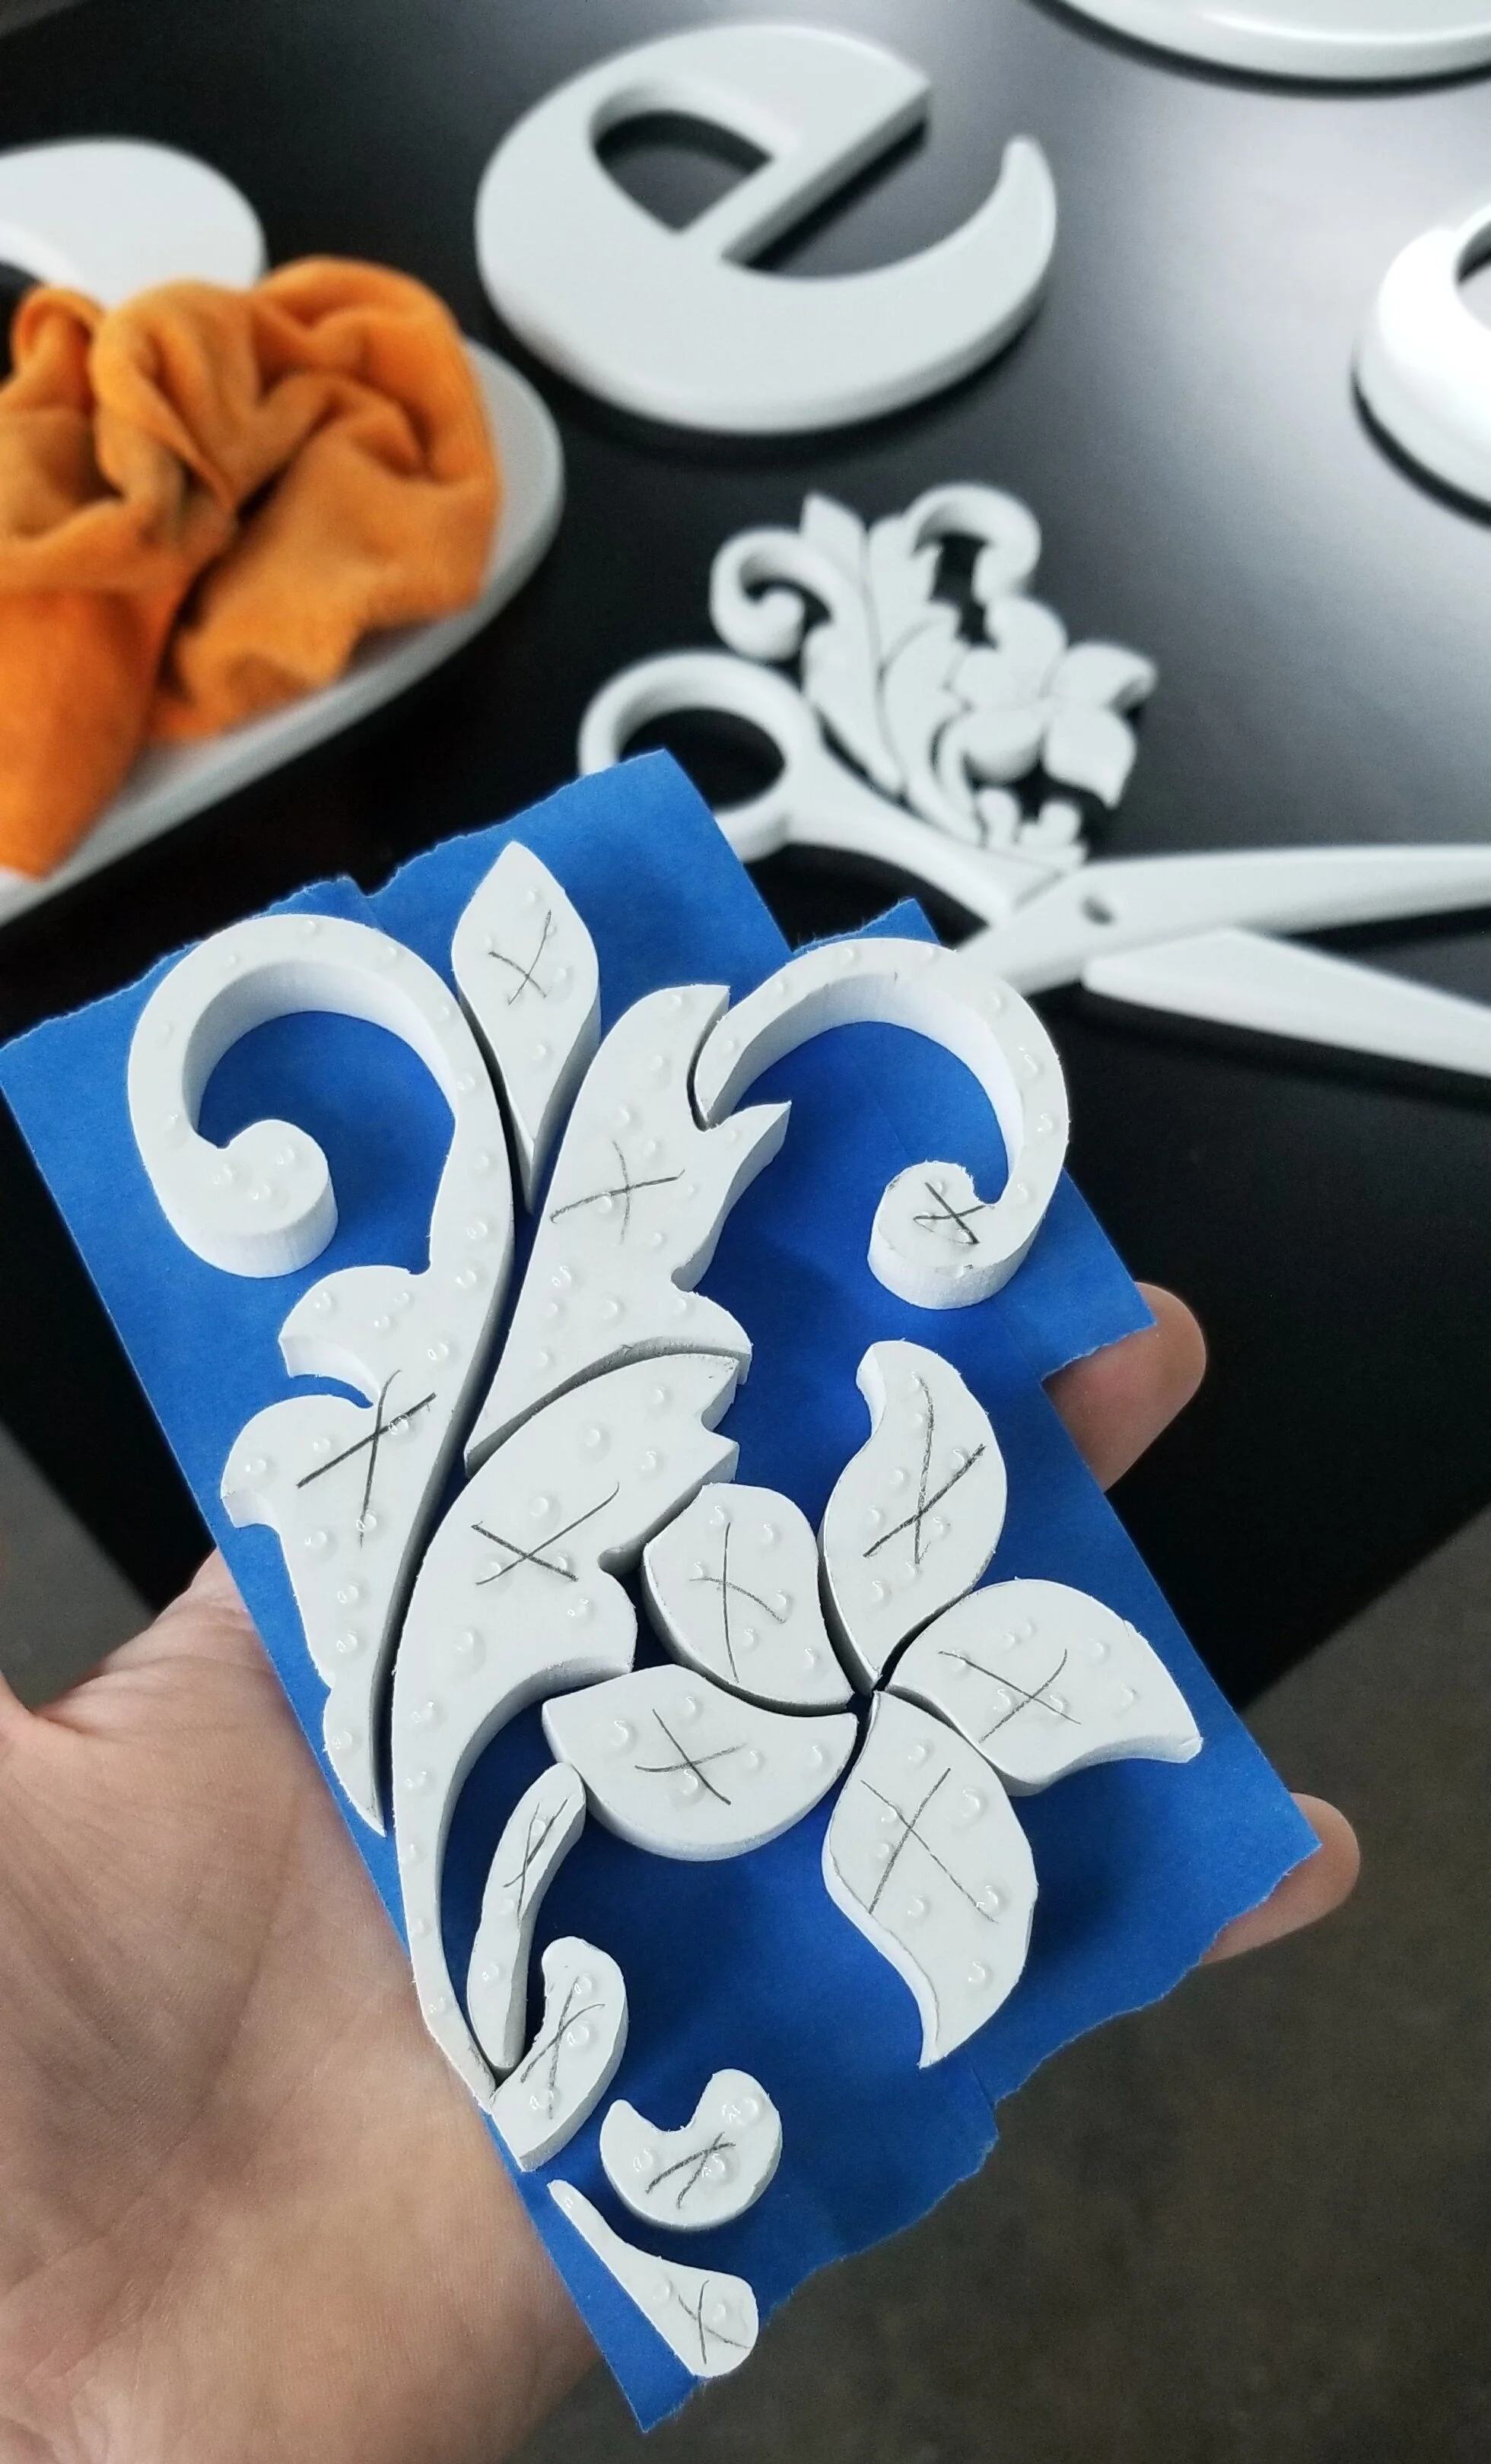
For these very small pieces, I used a trick to keep them aligned properly. First I made a new job in VCarve at 8.5 x 11” (letter size of paper). Then I copied just these small parts into the new job and exported them as a PDF document. That allowed me to print them at full scale and use that as a assembly template. I then aligned the parts on the template face up and used painter’s tape on the face to hold them all together. Lastly, I just simply flipped the entire assembly over, applied the glue, pressed firmly into place, and then took the tape back off.
Final Product